Many homeowners like to try their hand at DIY from time to time, but some clients can overreach their skillset when attempting renovations like loft conversions . From our first hand experience we have seen some nightmare loft conversions gone wrong that we have had to correct.

If not done properly however, Do It Yourself  can cause lasting and expensive damage to a property, leaving the owner wishing they’d called in a professional company to do the job instead, and paying out even more to get it fixed Complete loft conversions guarantee none of the following will happen on your build.
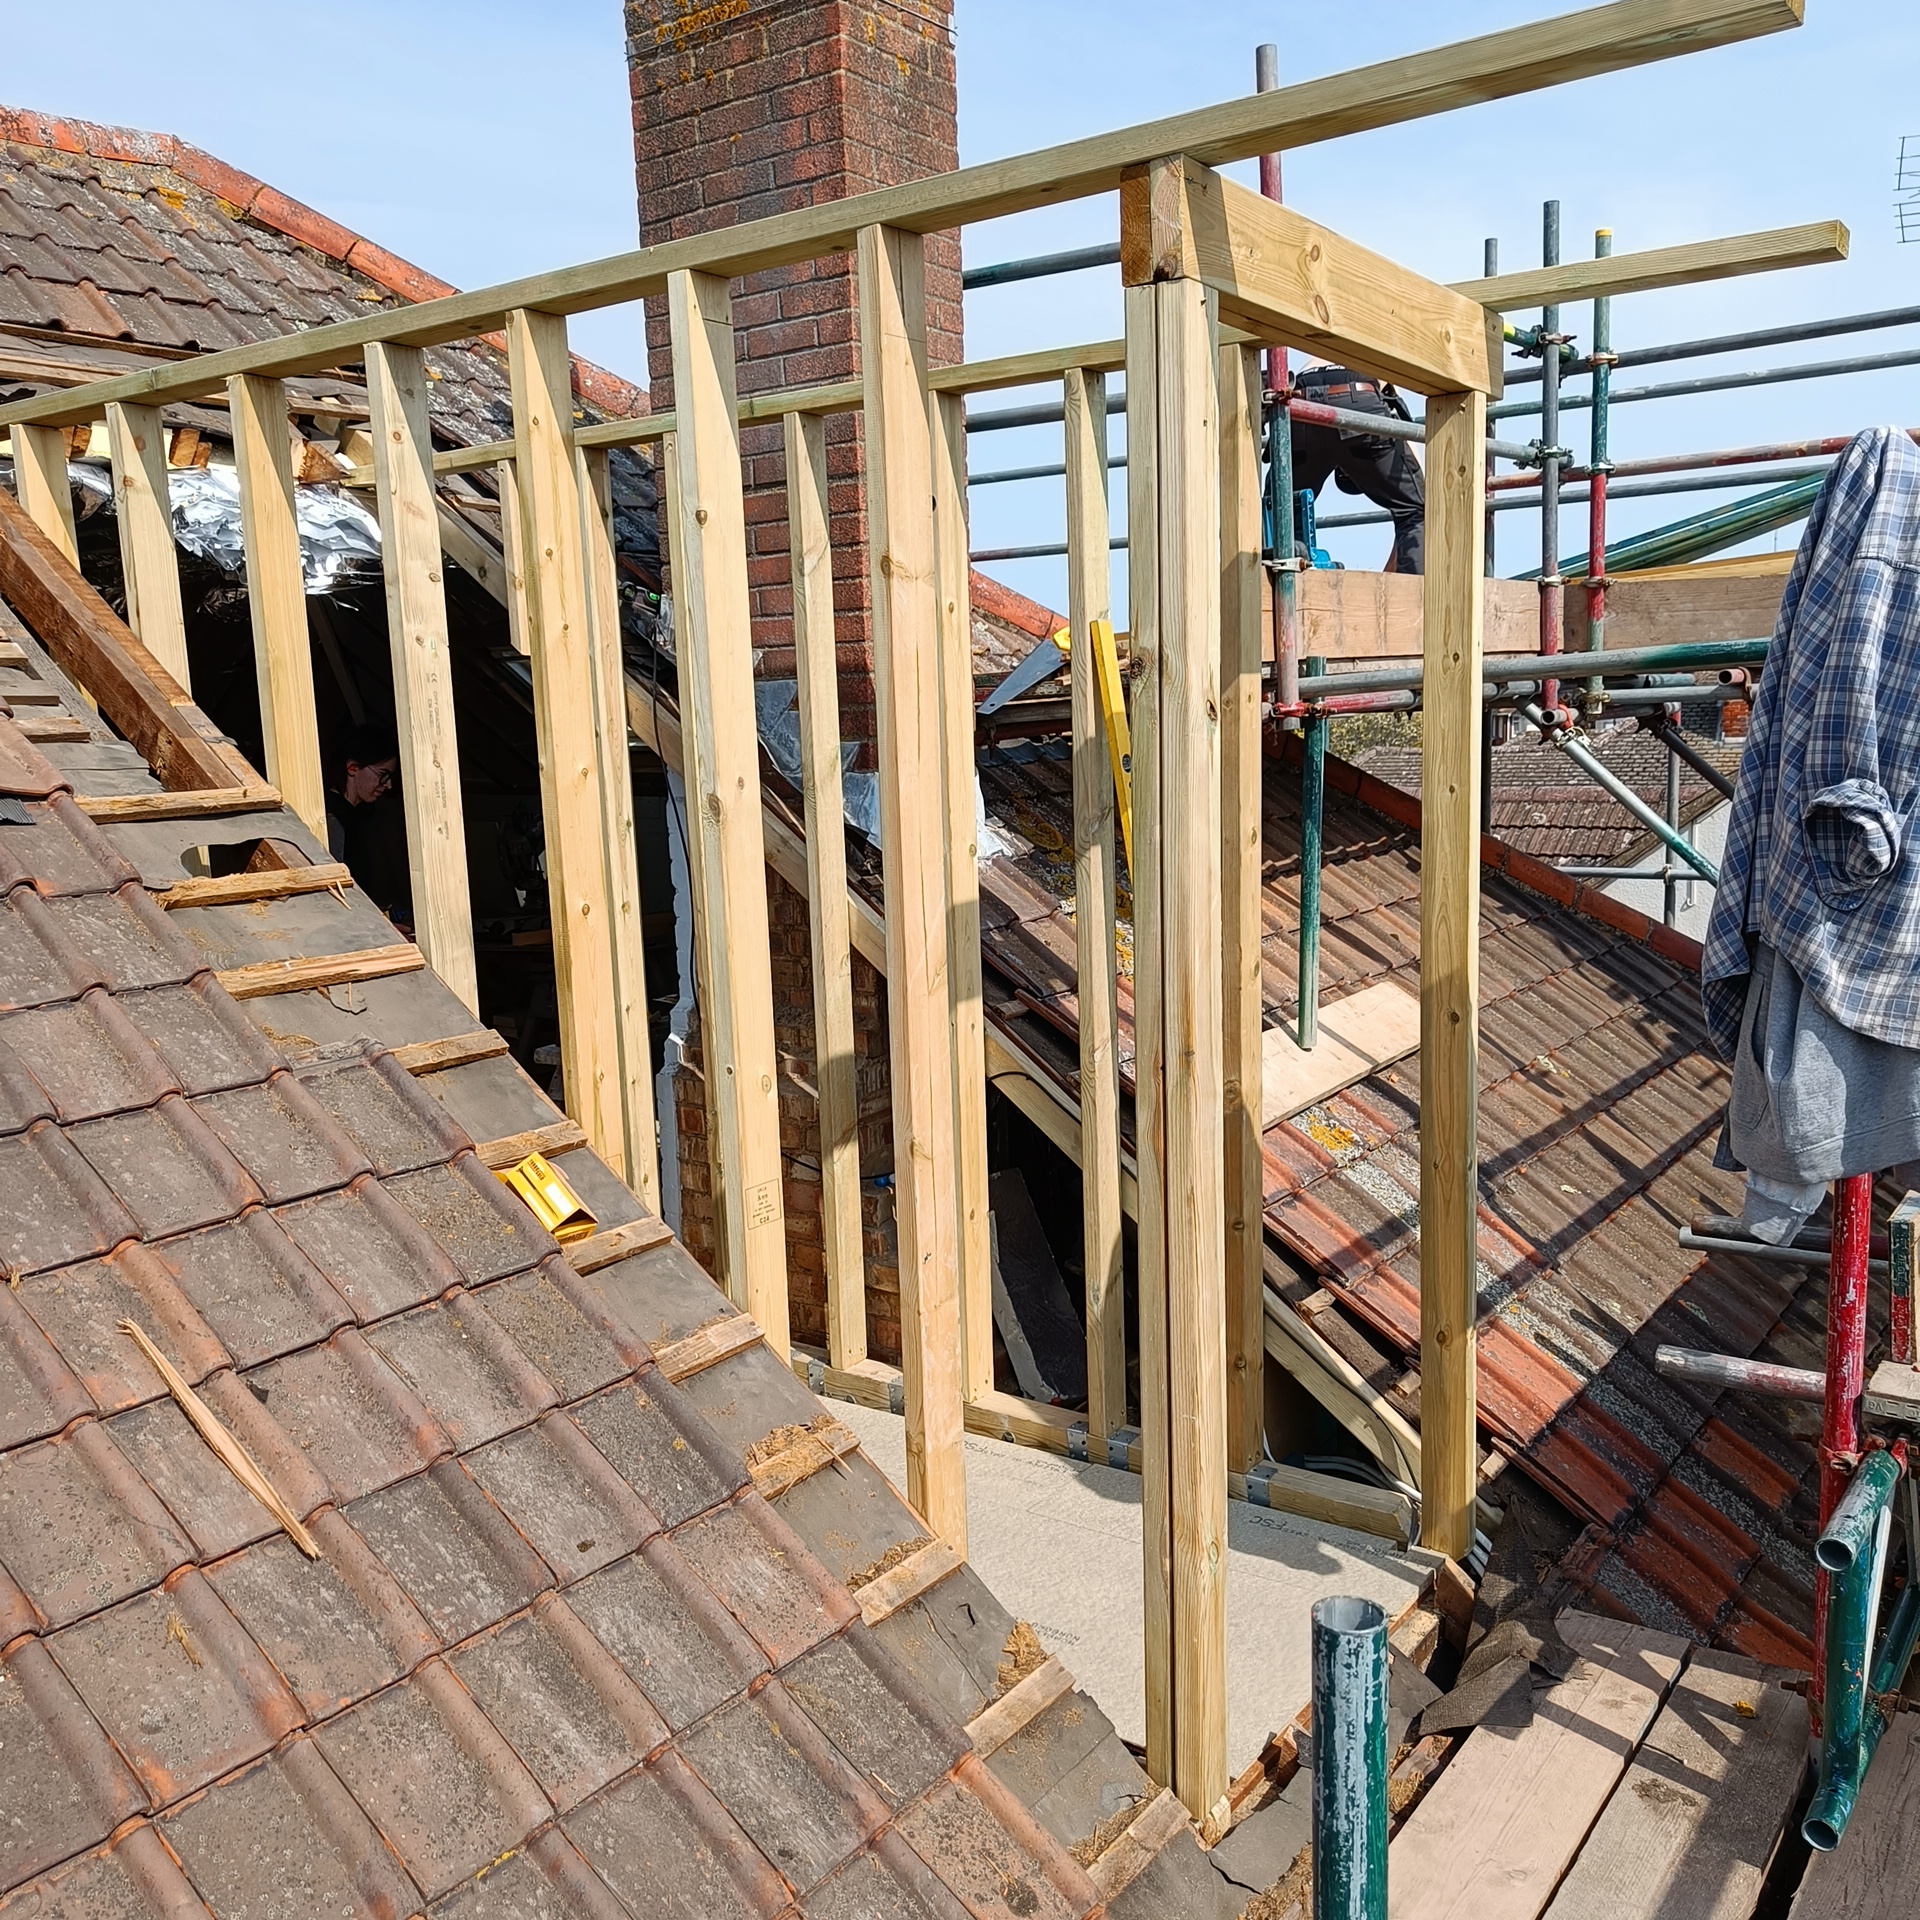
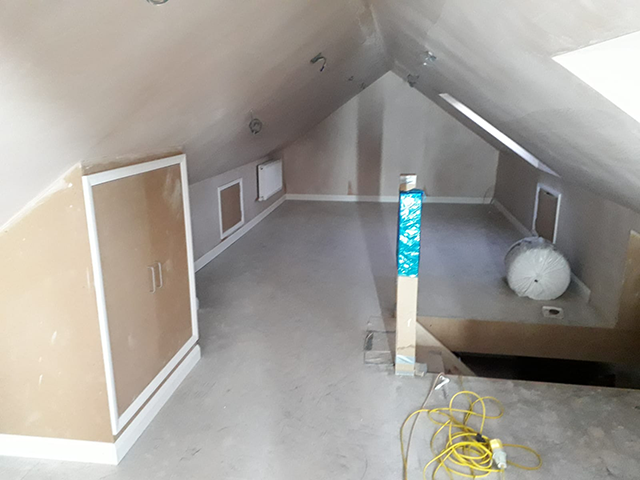
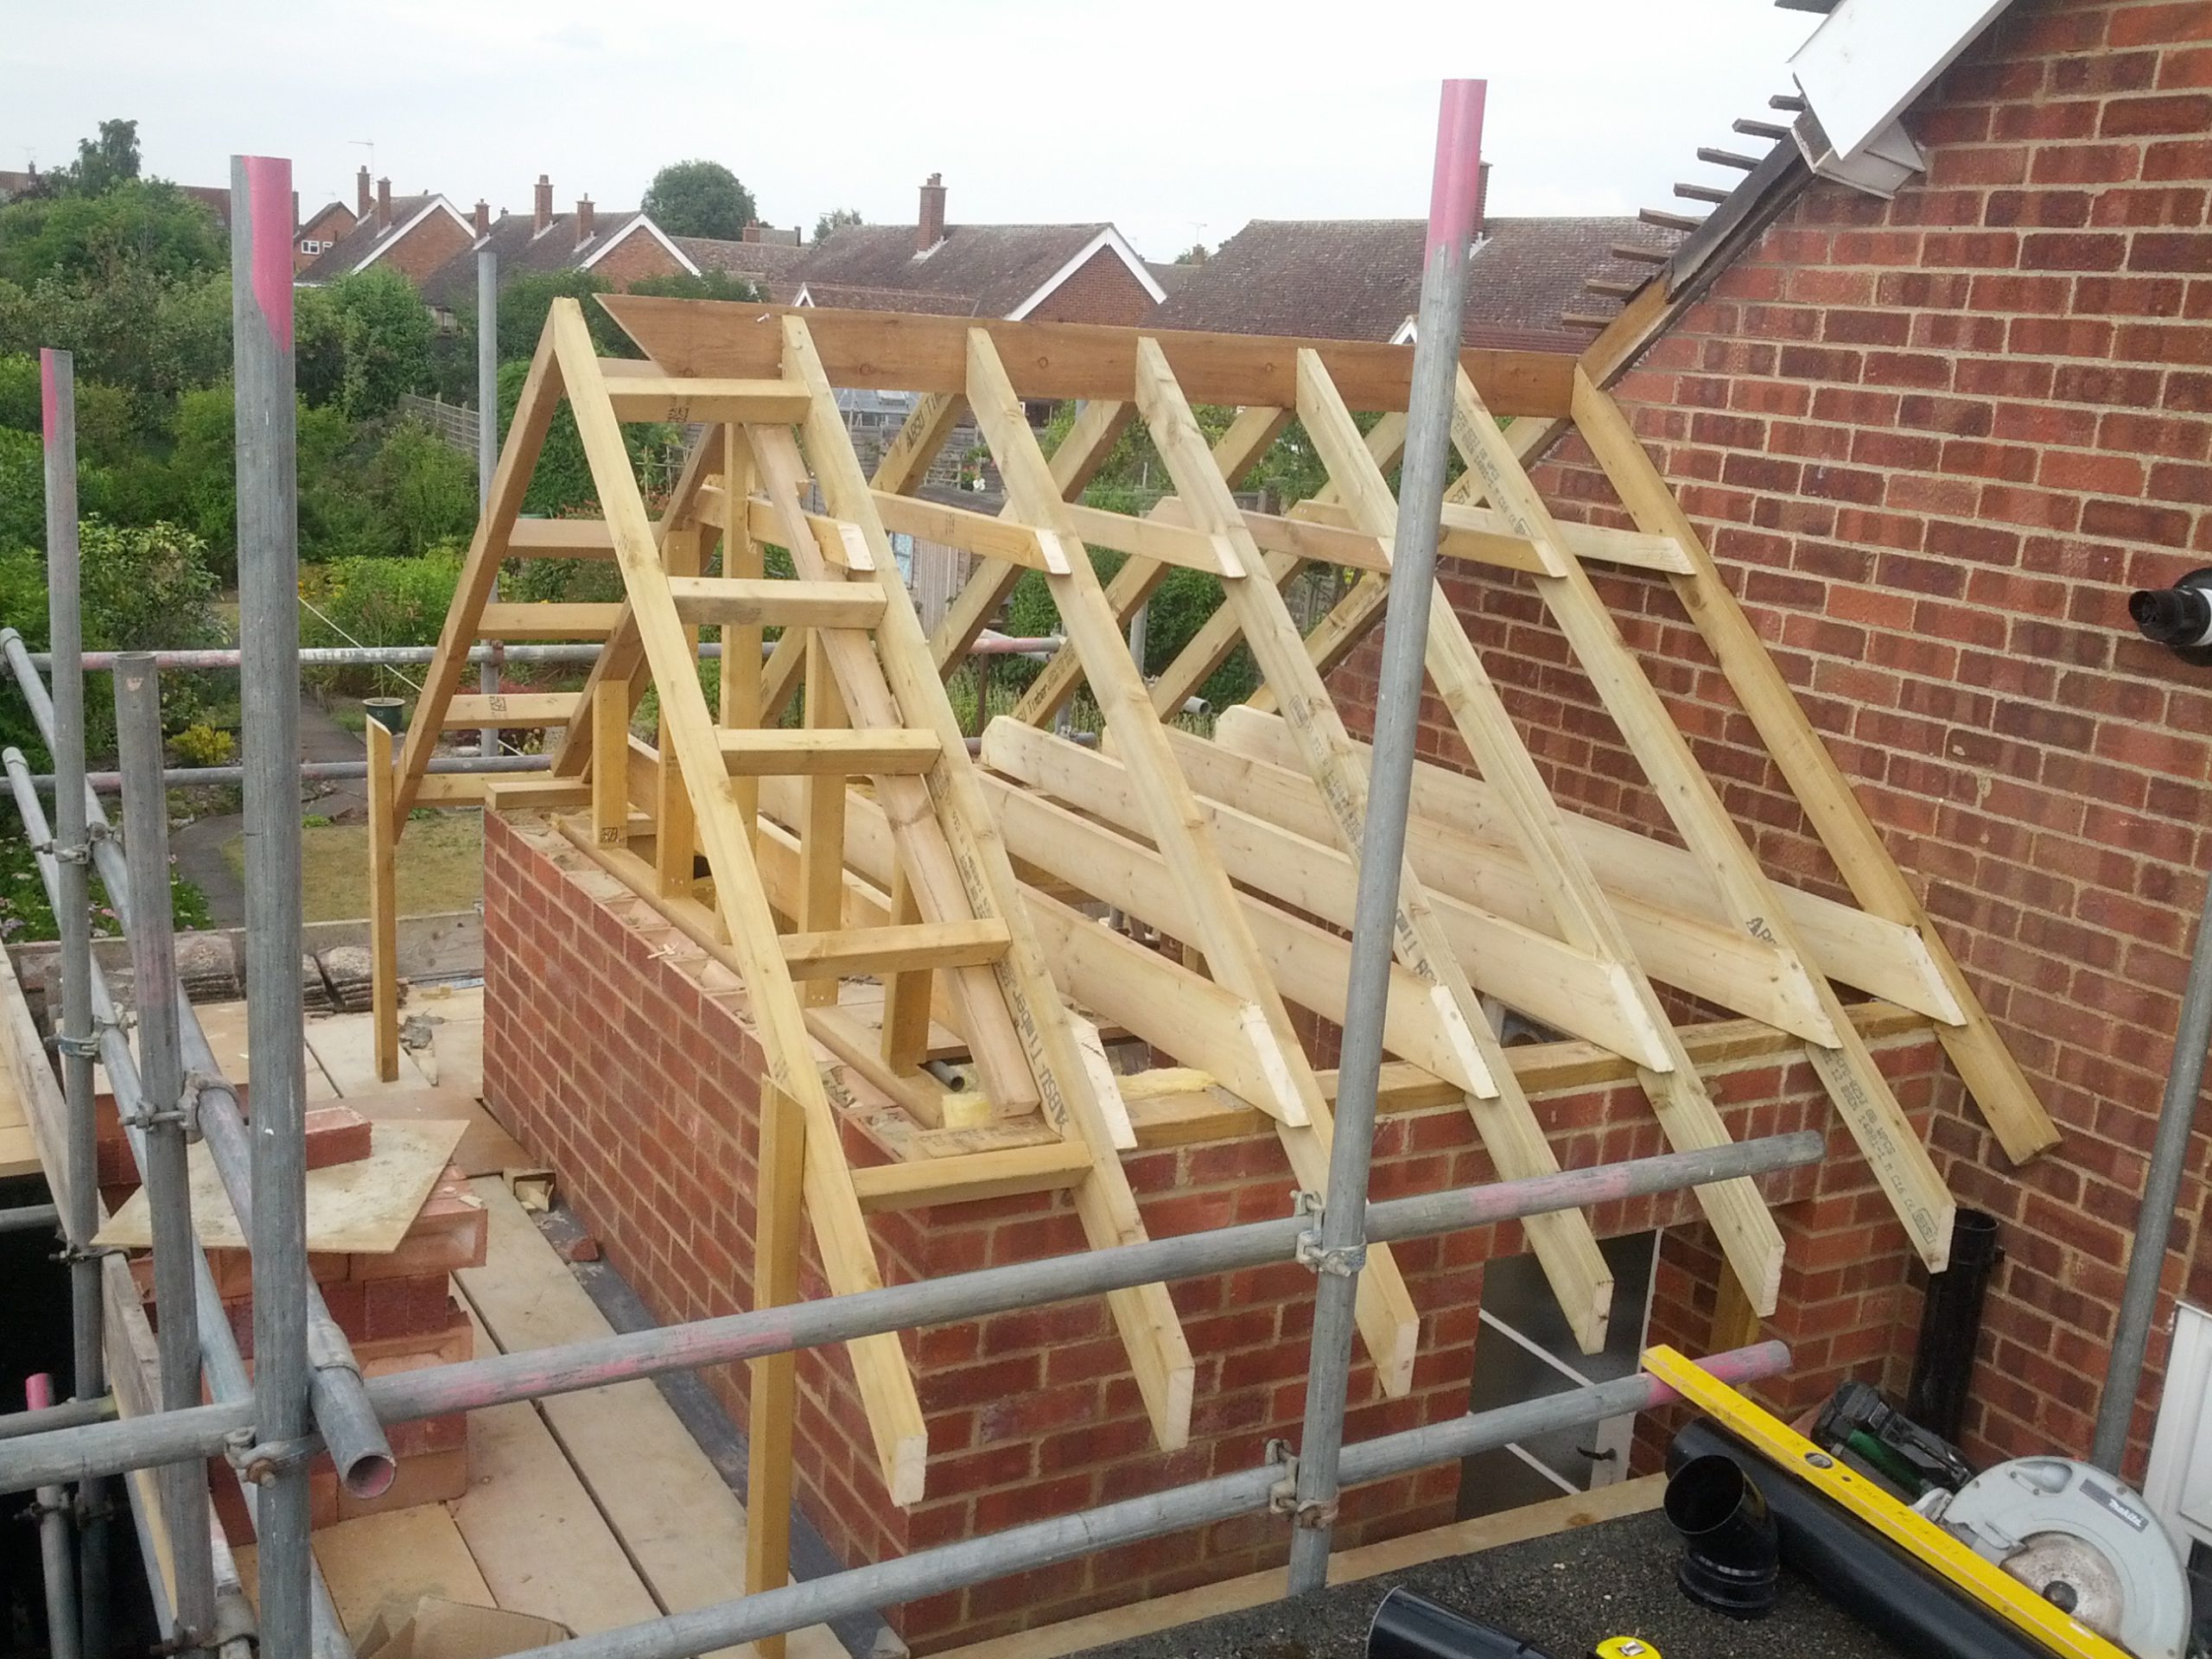
1. Loft conversion

Can costs up to £35,000 to fix, attempted by 5% of homeowners

Greg Nelson form CLC said : “No work should be done on a loft conversion without confirming that safety regulations are in place and that the room will be legal, as this can waste a huge amount of time and money and result in you having to have the whole thing redone. You may also cause more damage than good, especially if you damage the roof or put a foot through the rafters.”

Assess the Situation: Take stock of the problems you’re facing. Is it related to structural integrity, electrical wiring, plumbing, or something else? Understanding the scope of the issues is the first step in finding solutions.

2. Knocking down a wall/part of a wall

Costs up to £25,000 to fix, attempted by 10% of homeowners

Greg Nelson from CLC said : “If you knock down a wall and don’t know exactly what you’re doing, you run the risk of your property suffering from subsidence. If you try to knock through a supporting wall, you also run the risk of your house collapsing, and losing everything. You should never knock a wall through without having it examined first to ensure there will be no other damage to the rest of the property.”

Consult with Professionals: Depending on the nature of the problems, you may need to consult with different professionals such as structural engineers, architects, builders, plumbers, and electricians. They can help diagnose the issues and propose solutions.

3. Replacing a kitchen

Costs up to £15,000 to fix, attempted by 8% of homeowners

Greg Nelson from CLC said :“Installing a new kitchen can cost around £5,000 depending on the size and materials used. If you take this into your own hands and damage the worktops, cabinets, and walls while doing so, you may need to replace these. Aside from added costs for materials, you’ll also need to factor in the labour costs, which could as much as double the price of your new kitchen.”

Review Building Regulations and Planning Permission: Ensure that your loft conversion complies with building regulations and planning permission requirements. If the problems stem from non-compliance, you may need to make modifications to bring the conversion up to standard.

4. Replacing a bathroom

Costs up to £10,000 to fix, attempted by 7% of homeowners

Greg Nelson from CLC said : “This can cost you anywhere between £3,000-£10,000 depending on the damage that you do. If you have to replace the materials that you bought for the job or cause damage to the plumbing and electrics in the bathroom, this will drive the cost up.”

Jonathan Larkin, 26 from Norwich, said: “We tried fitting a new bathroom a year or so ago, and thought we’d done a good job. That was until we realised that the sealant we had borrowed from my dad had been out of date and we had leaks all over the bathroom wherever we used it.”

5. Installing cabinets

Costs up to £4,000 to fix, attempted by 18% of homeowners

Greg Nelson from CLC said : “You may cause damage to both the cabinet and the wall that you’re attaching it to, meaning you will need to replace the cabinet, fix the wall, and then pay labour costs for this to be refitted. Depending on the amount of cabinets, materials used and size of them, this can cost you around £4,000.”

6. Laying floors

Costs up to £3,500 to fix, attempted by 18% of homeowners

Greg Nelson from CLC said :“This will depend on the size of the room and the material that you’ve chosen for the flooring. If you lay incorrectly you can damage the material, meaning you must pay to replace it. To do this for the whole floor, this can cost you anything from £1,500-£3,500.”

Prioritize Safety: If there are safety concerns such as structural instability or electrical hazards, address them immediately. Safety should always be the top priority.

7. Installing a light fixture

Costs up to £3,000 to fix, attempted by 28% of homeowners

Greg Nelson from CLC said : “Replacing bad electrics could just be the cost of replacing the fitting, but it could also involve having to fix the wiring completely. Electrical work can also be dangerous if you don’t know what you’re doing and is a health risk. If this goes dramatically wrong, rewiring a 2-bed house can cost around £3,000 and 5-8 days”

Take Preventive Measures: Once the issues are resolved, take preventive measures to avoid similar problems in the future. This may involve regular maintenance, periodic inspections, and hiring reputable professionals for any future renovations or construction projects.

8. Running power into an adjacent structure

Costs up to £3,000 to fix, attempted by 11% of homeowners

Greg Nelson from CLC said “If you cause damage to the wiring in your house doing this, you could need the whole house rewired, which can cost around £3,000. It is also very dangerous if not done correctly and could result in a fire or explosion.”

Document the Issues: Keep thorough documentation of the problems you’re facing, including photographs, written descriptions, and any correspondence with contractors or authorities. This documentation may be valuable if you need to seek legal recourse or insurance claims.

9. Replacing a fuse box

Costs up to £3,000 to fix, attempted by 10% of homeowners

Greg Nelson from CLC said:“This is extremely dangerous if you don’t know what you’re doing. You could cause damage to the wiring in your house, which can cost over £3000 to fix, along with the risk of fire or explosion. Any work with electricity should only be carried out by a professional.”

Obtain Multiple Quotes: If you need to hire professionals to fix the issues, obtain multiple quotes to ensure you’re getting a fair price. Be wary of significantly low quotes, as they may indicate subpar workmanship or the use of inferior materials.

10. Installing a shower

Costs up to £3,000 to fix, attempted by 8% of homeowners

Greg Nelson from CLC said“You may cause damage to the water pipe, the shower itself and the tiling in the bathroom, which can cost you up to £3,000 to fully repair and replace. If your shower is electric, it can also be very dangerous.”

Consider Legal Options: If the issues are the result of negligence or malpractice by contractors or builders, you may have legal recourse to seek compensation for damages. Consult with a legal expert specializing in construction law to explore your options.

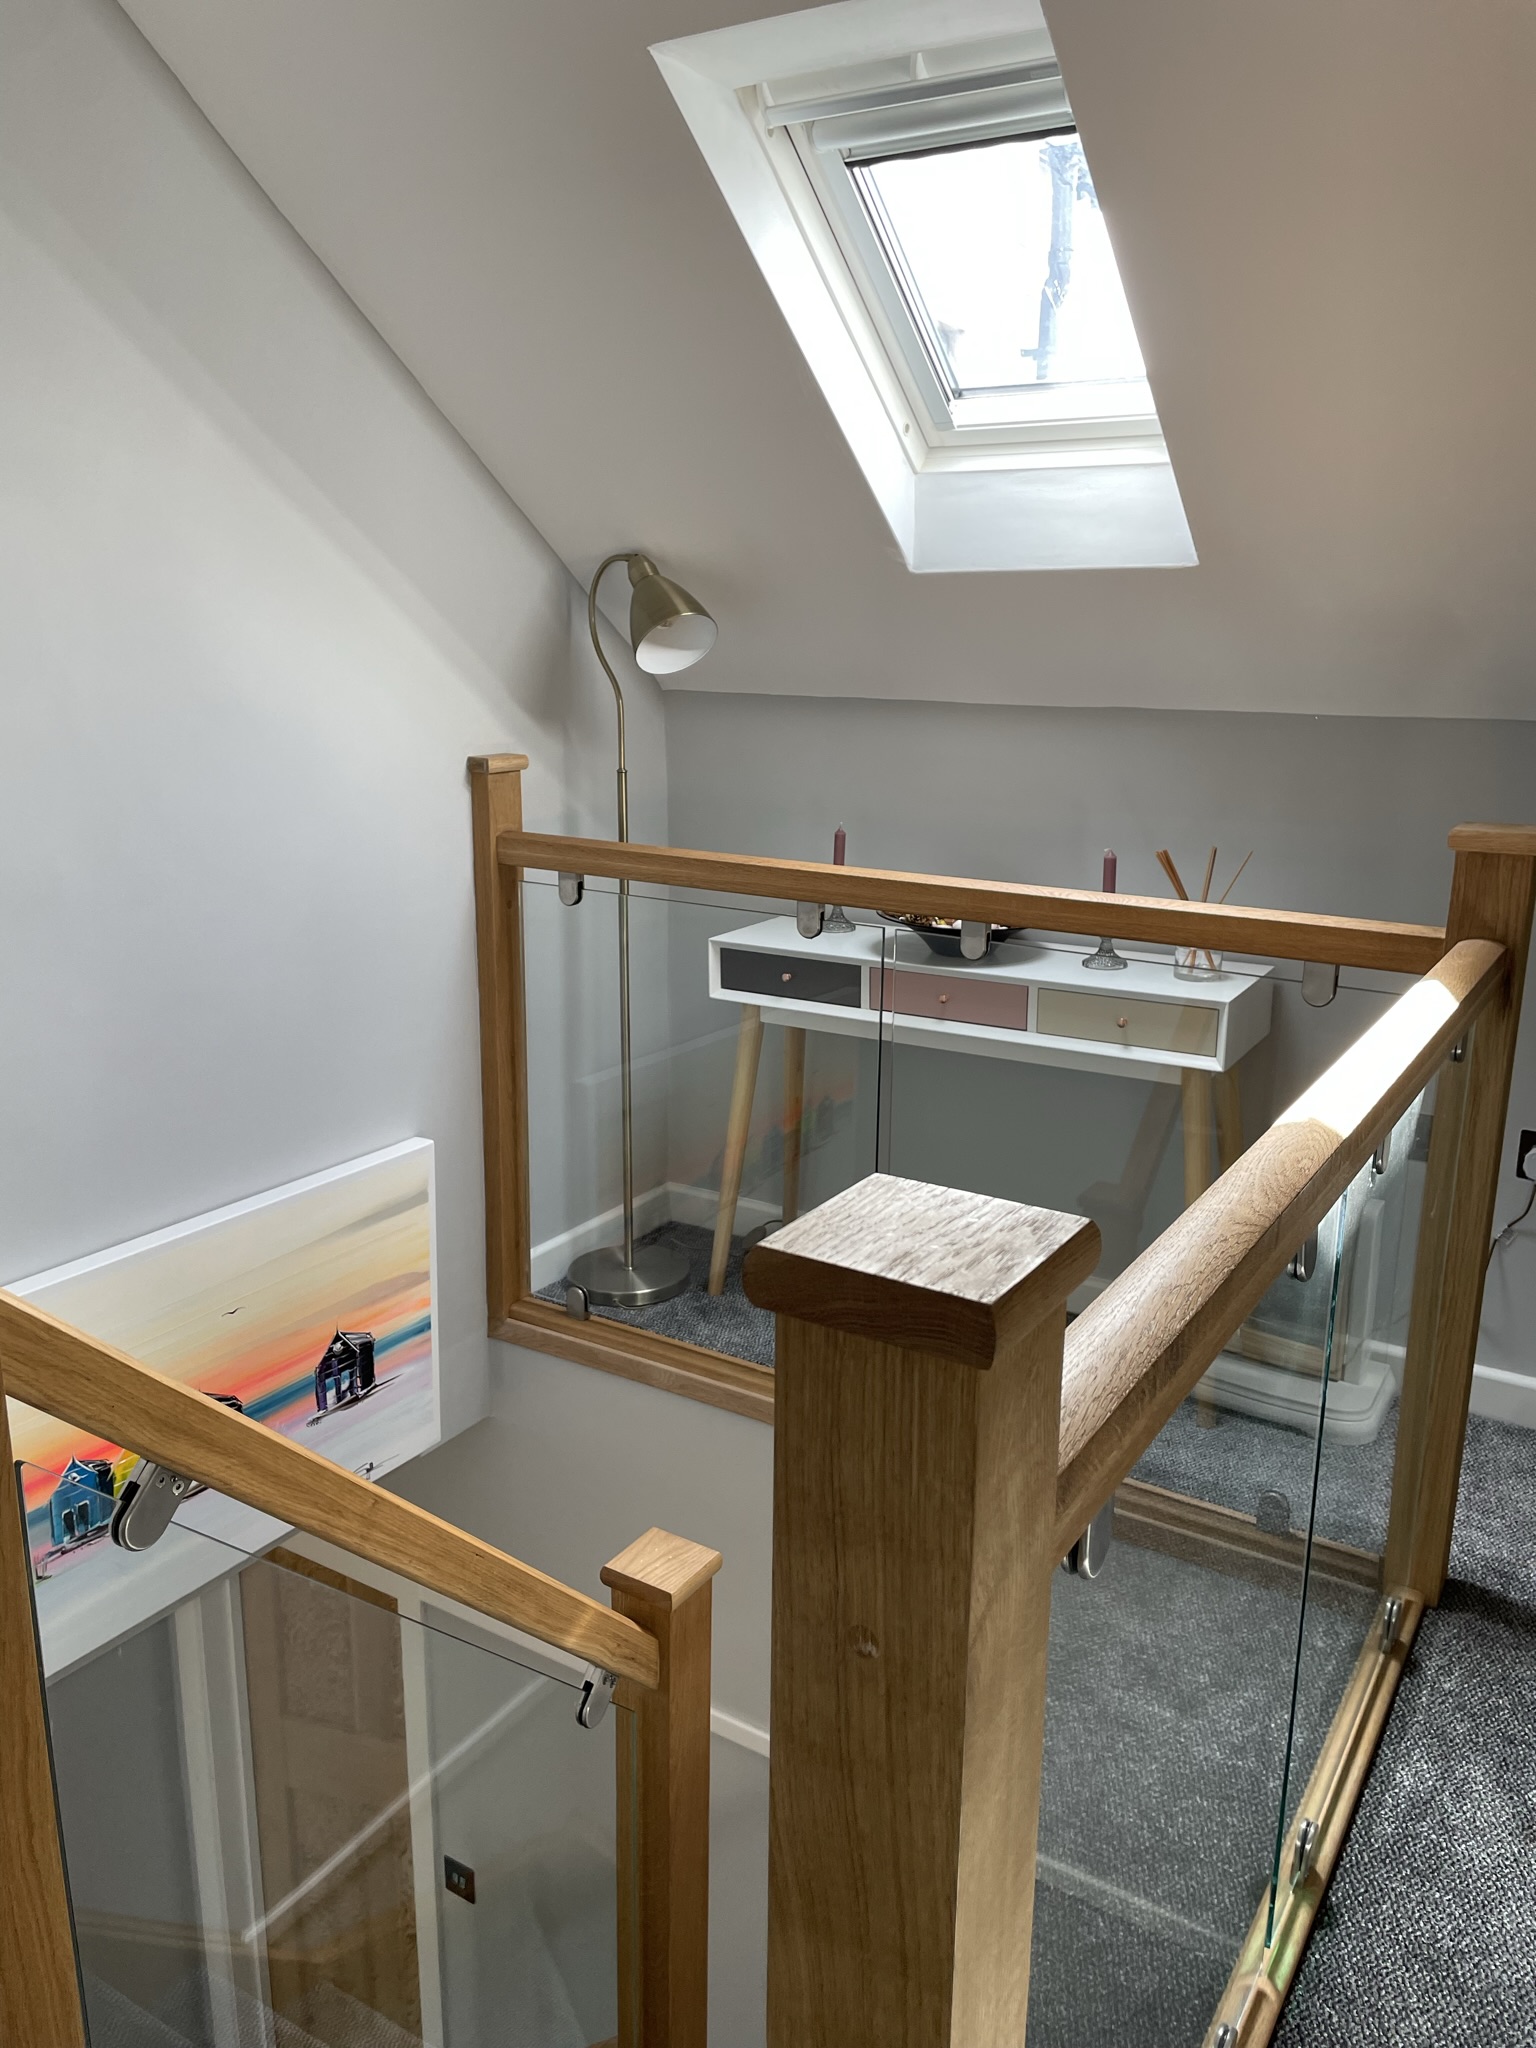
Remember that addressing a loft conversion nightmare can be stressful and time-consuming, but with careful planning and the right professional assistance, you can mitigate the issues and turn your nightmare into a success story.

If you wish for a no obligation quote to get your loft conversion done right first time Complete Loft Conversions are your first port of call for loft conversions timber framed extensions and garage conversions in the Ipswich Suffolk area

Haven’t posted for a while as been very busy with work but let’s have a run through what’s been going on at this conversion.

So let’s have a look at the conversion in stages below we can see the existing boards removed and electrics being moved to make way for the new joists.

Loft striped out and electrics being moved


Here we can see the new beams going in for the new ashlar walls to sit on.

New beams going in for ashlar walls

Below we can see the new joists attached to the ring beam and the new ashlar wall sitting on top and floor being laid over

New ashlar walls and joists


Here we can see the access hatch and insulation going in

Insulation and access hatch going in

Here we can see multifoil installed over cleotex with batten on top and new vellum

Multifoil over cleotex with batten on top

Here we can see en-suite walls being built and velux installed

ensuite walls being built and velux installed


Here we can see the rear dormer being built

Rear dormer being built

Here we can see the dormer under construction and being clad with hard plank

Dormer under construction

Here we can see the internal walls and electrics going in

Internal walls and electrics going in

Thats all for the moment but will update this post with everything finished thanks for reading.

Haven’t posted for a while because been so busy with doing lofts this year so a quick post just to go though what’s been going on at CLC in 2021.

So we were commissioned to carry out a loft conversion at Defoe Rd this conversions was a big one with a flat dormer en-suite and some alterations to walls and making new openings downstairs.

The loft conversion also incorporated new cupboards in the sloping part of the roof and two large flying mullion windows and a pair of Keylite windows side by side.

So below we can see a few images of the loft at different stages of the build I will update these fully when the bathroom is complete next week.

We have all been carry out many garden rooms through our sister company CLS but will post on our other website and link back to this post.

Loft being fitted with multi foil and first fix electrics


Staris fitted with spindles and balustrades
Stairs fitted with spindles and balustrades


Roof watertight with three layer felt


Loft plastered with side by side Keylite windows

We can see the loft on construction at various stages of the build the build took around 3 months as there were walls to move downstairs and openings to cut out but as we can see the end result is outstanding if you would like a quote for a conversion like this don’t hesitate to contact us

CLC have been carrying out many extensions and loft conversions though 2019, to much to put on the site so we will just focus on Wind-rush Rd where we were commissioned to carry out a loft conversions for a lovely couple. The conversion consisted of steel beams sitting on the outer walls to take the new joisted floor, ashlar walls and rest of the conversion.


Beams installed with ashlar walls

Above we can see the joisting installed with ashlar walls with the insulation being placed within the floor we also had to install new 140mm rafters to take away the existing fink trusses.


Celotex installed
Celotex installed

Here we can see the celotex installed with lighting ring installed we can slo see the flue for the boiler which needs to be boxed in we can also see the velux installed.

Stairs being installed

Here we can see the installation of the stiar case which was particularly tight this is an open tread staircase we can also see the ashlar walls with structural ply installed.

Stairs installed
Stairs installed

Here we can see the stairs in the opening and the purlin to take the above rafters.

Landing being built
Landing being built

Here we can see the landing being built.

Open tread stairs installed

Here we can see the open tread stairs installed and protected

Loft plastered ready for painting

Here we can see the loft ready for plastering

Cupboards built to gain access to flue and storage

Here we can see the cupboards built to gain access to the storage space and flue.

Complete loft conversion have started another conversion on a one hundred year old property for our new clients the loft will have three velux roof windows in the front and a huge dormer window at the back.

I haven’t posted for a while because  we have had issues with the website and Talk Talk who were handling our business broad band (badly) I would not recommend them in a million years.

Anyway we are still converting lofts in and around the Ipswich Suffolk area along with other projects including Foxhall rd which we have installed new floor, stairs and steels ready for the massive 6 meters dormer clad with slate on the back of the property.

The floors concept of 8×2 C24 timbers sitting on the external walls and the internal load bearing walls to accept the 22mm caber floor.

As we can see from the images the loft is a hand cut roof with no felt so the whole of the roof is being membraned while the scaffold is up.

Loft insulated with multifoil

As the property is over 100 years old and the chimney stack is still in use we needed to provide a 90mm x 90mm post to hold the ridge beam up.

For more on information on New regulations for loft insulation please follow this link.

We will keep updating the site with more info once we break into the roof.


Complete loft conversions Ipswich have completed another loft conversion this one was a large 5 meter dormer construction with one roof window and fully kitted out en-suite.

Below we can see the glulams being installed and the ashler walls erected before taking out the finik trusses.

glulams-installed
glulams-installed

Here we can see the next stage of construction the joists between the gluelams and the chipboard floor being installed.

timber-floor-installed

After the timber floor is installed we installed the stair case to gain complete access to the loft.

Fitting-of-stair-case

Once the stair case has been fitted the the internal walls can be erected.

Internal-walls-erected

Once the internal work is completed we erect the scaffold and break through the roof and create the flat dormer as seen below.

Building-flat-dormer

We then build the dormer and dormer cheeks and put the facias and soft on then we also cald the top deck and felt the roof so we are water tight.

Flat-dormer-construction

As we can see below the dormer is built and water tight but not clad we need to put in the windows which and take a month on order before doing the cladding.

Dormer-built-but-not-clad

We also needed to put in a velux and ventilation for the cold roof above the dormer to keep the air flowing around the roof space.

velux-installed
velux-installed

We then set about installing the insulation which was 70mm celotex fitted tightly between the joists and rafters and taped with foil tape to stop cold spots.

Foil-backed-insulation-installed

We also celotexed the celing and around the dormer cheeks.

Celotex-around-dormer

We then put space blanket equivalent to 200mm celotex to get the U values for the build and the 25mm battens over to take the plasterboard.

Space-blanket-over-25mm-battens-for-vapour-barrier-and-more-insulation

Now with all the plumbing and electrics tested and checked the whole loft space is plasterboarded and plastered.

Loft-conversion-plastered

Here we can see the window board radiator and loft nearly complete

Dormer-and-window-plastered

We also fitted the bathroom to the clients specifications which included walk in shower,mermaid board,sink and toilet.

toilet
Armitage Shanks toilet installed

Complete loft conversions carry out the complete conversion to the last detail

shower
Shower installed

Here we can see the loft conversion with the scaffold down and all of the cladding guttering and lead work complete.

Completed-loft-conversion


Call Now Button