Well seeing as we are all stuck indoors for a while though I would post some picture of our most recent project below we can see work on a new extension stating the project is a timber framed extension with large slide and fold doors with a roof lantern.

Mini digger excavation for new foundations

We were commissioned to build a single story timber framed extension with massive slide and fold doors.

Shuttering ready for concrete
Shuttering ready for concrete pour

The shuttering you can see helps us keep the required width 450mm and the required depth 750mm and keeps a nice straight line and you might also spot the laser in the back ground this means the shuttering goes in level within 0.3mm tidy hey.

Concentre pored and shutters removed

Here we can see the foundation with the shutters removed to show the correct width, depth and levelled in correctly.

Joist with vents
Joist with vents

Here we can see the first layer of blinding before the Dpm goes down we can also see the brick vents to provide ventilation for the floor

brick work with timber frame
Brick work with timber frame

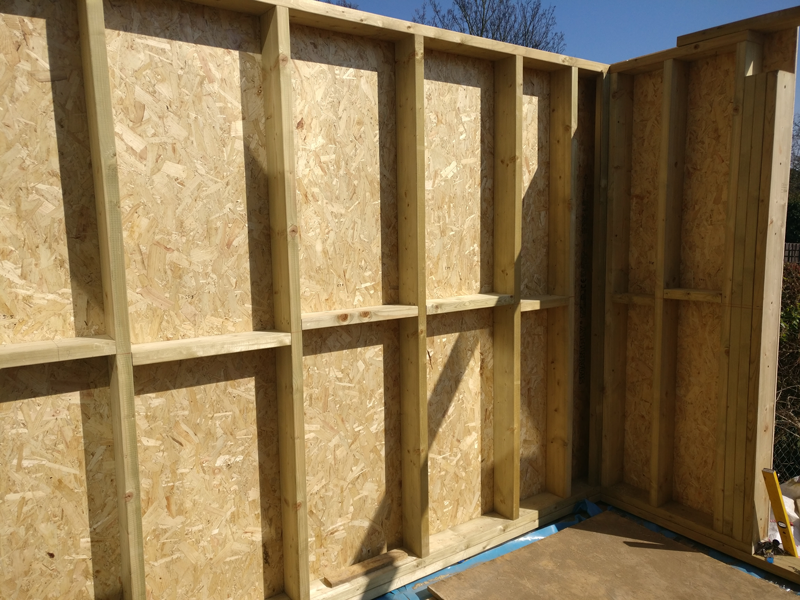
Here we can see the brickwork installed and the timber frame sitting on the sole plate.


Joists installed
Joists installed

Here we can see the 9 inch brick wall backfilled with Dpm and a blinding of sand and cement onto of a 2000gsm membrane the joists sit in hangers with Dpm behind them so stop moisture ingress.

Havent posted for a while but thought I would post up a couple of pictures of recent loft conversions the pictures below are of the I joists being installed I joists are a structural beam which negate the need for steels and can be installed by removing the first four rows of tiles and then being slid in to sit on the existing plate, also not the JES (joist end support) to give the joist riggidity when cut to fit in the eaves.

I-joist
I-joist

We can also see the gluelams before installation, gluelams are a structurally graded beam which come in standard and custom sizes the beauty of gluelams is they do the same job as a steel but are lighter stronger and easier to install and fix to and can also be cut on site to requirements.

glulams before install

With beams of this size and nature there is an issue with getting them up to the second floor so we usually hire in a crane and a banks man to help our team with the lifting as we can see below.

Beam-installation-with-crane

As we can see the creation of a new floor above the existing building has begun  once the beams are in place the next of the work can continue the creation of the stair well with gluelams and hangers connecting the old and existing joists to support them around the stair well and the creation of the ashler walls and the ceiling ties to support the new structure before the old fink trusses can be removed as shown below.


Before-fink-trusses-removedBefore-fink-trusses-removed
Before-fink-trusses-removed


after trusses removed
After trusses removed

So the existing structure is removed the weight is transferred onto the ashler walls which are the small walls in the corner which then transfers the weight onto the new I joists and the gluelams onto the wall plate of the existing building so what next we need light.

dormer under construction
Dormer under construction

As we can see we now need to create natural light by adding dormers by supporting the trusses either side with extra timbers for strength and remove the existing tiles battens and felt carefully before building the pitched roof dormer in this case there will be three so more to come when they are buit ok.


Call Now Button